Creating an openHAB sitemap
Goal
The goal for this post is to create some basic Items and a simple openHAB Sitemap
What you need
- An openHAB 2.0 standard installation
- The ability to edit text files in Linux. We will use
vimin this post
Install vim
I prefer to edit text files via vim, though you could edit files via nano or emacs or any number of text editors.
sudo apt-get install vim
What are Items?
From the openHAB site:
Items represent functionality that is used by the application (mainly user interfaces or automation logic). Items have a state and are used through events. They can be read from, or written to, in order to interact with them. Items can be bound to bindings i.e. for reading the status of e.g. a bulb or for setting it
We will talk about bindings in a different post. In this post we’ll create some items for our garage door opener
Create some Items
Configuration files for openHAB are located by default in /etc/openhab2. Item configurations are located in /etc/openhab2/items. All items end with a .items extension. All files with that extention will be loaded, so it makes sense to group like items into the same file. Let’s start by creating an garage.items file with the following content (you will need to open the file as the openhab user, i.e. sudo -u openhab vim garage.items:
Group GarageDoor <garagedoor>

Contact GarageDoorClosedSensor <garagedoor> (GarageDoor)
Switch GarageDoorSwitch <switch> (GarageDoor)
What have we done?
The above is a basic items definition. Each line represents an Item. The first token in the line specifies the ItemType. In this case we have three, Group, Switch, and Contact. The Group type allows us to arbitrarily group items together. The Contact type allows us to to determine if something is on or off when reading from an Item state. Switch allows us to flip a switch from on to off and vice versa. A full list of ItemTypes can be found here.
The second token defines the name of the Item. Item names must be unique.
The third token defines the icon. Here we add the included icon <garagedoor> to the GarageDoor group and the GarageDoorClosedSensor group, and the <switch> icon to the GarageDoorSwitch Item.
The fourth token defines the group or groups that the Item that the items are associated with. Here, our GarageDoorClosedSensor and the GarageDoorSwitch Items are a part of the GarageDoor group.
These Item definitions are incomplete, however, since we haven’t described a Binding. We will delve into that in a different post.
What is a Sitemap
A sitemap is a view of all of the entities within openHAB. This allows you to organize all of the items within your home automation setup. Sitemaps (as are all other entities) are setup via text files.
Create a basic Sitemap
Sitemap declarations are house in the /etc/openhab2/sitemaps directory. All Sitemap files end with .sitemap. Create a file called myhouse.sitemap by running sudo -u openhab vim /etc/openhab2/sitemaps/myhouse.sitemap and enter the following text:
sitemap myhouse label="My home automation" {
    Frame label="Garage" {
        Text item=GarageDoorClosedSensor
        Switch item=GarageDoorSwitch

    }
}
What have we done?
The Sitemap syntax is much like the Item definition. The first token is the sitemap keyword, followed by the name of the Sitemap, here specified as MyHouse. The next token is the label for the Sitemap, which will be the text banner of the sitemap when we open it in the openHAB ui. Within the Sitemap definition we specify a frame label Garage and defined a single element, the group GarageDoor that we specified in the Items section of this post.
Verify the Sitemap by navigating to the UI
Open a browser and naviate to the following URL http://raspberrypi:8080/basicui/app?sitemap=myhouse. This is the URL for the sitemap myhouse.sitemap that we just created in the Basic UI of openHAB. You should see the following:
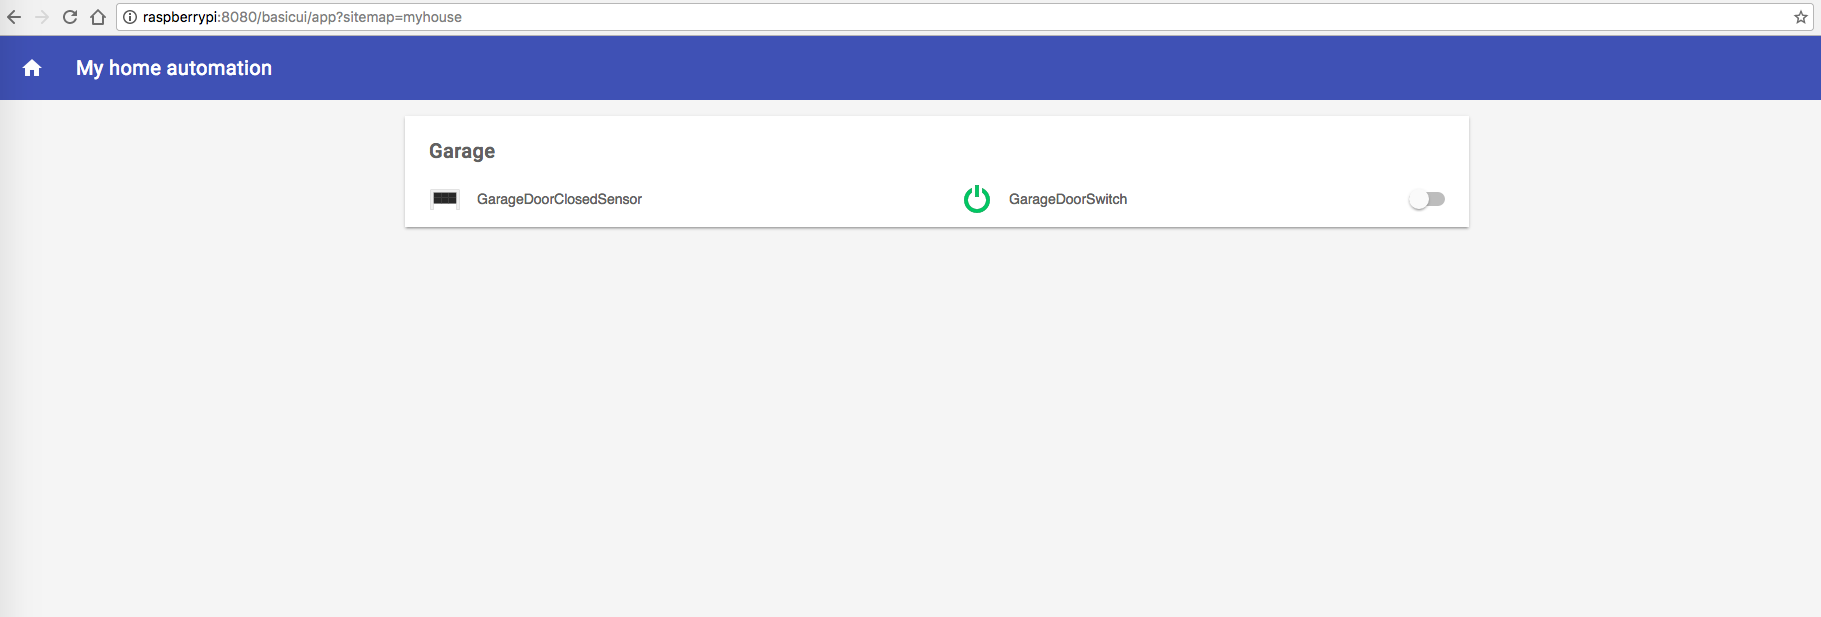
Congratulations! You’ve just created some basic Items and created a Sitemap!